How do I pair (or re-pair) a Square Terminal?
First up, you’ll need to sign out of the Terminal – the easiest way to do that is just to factory reset it by holding down the power button for 10 seconds until you see a black screen with a count-down timer. Keep holding down the power button on that timer goes to 0 and the screen says you can release the power button.
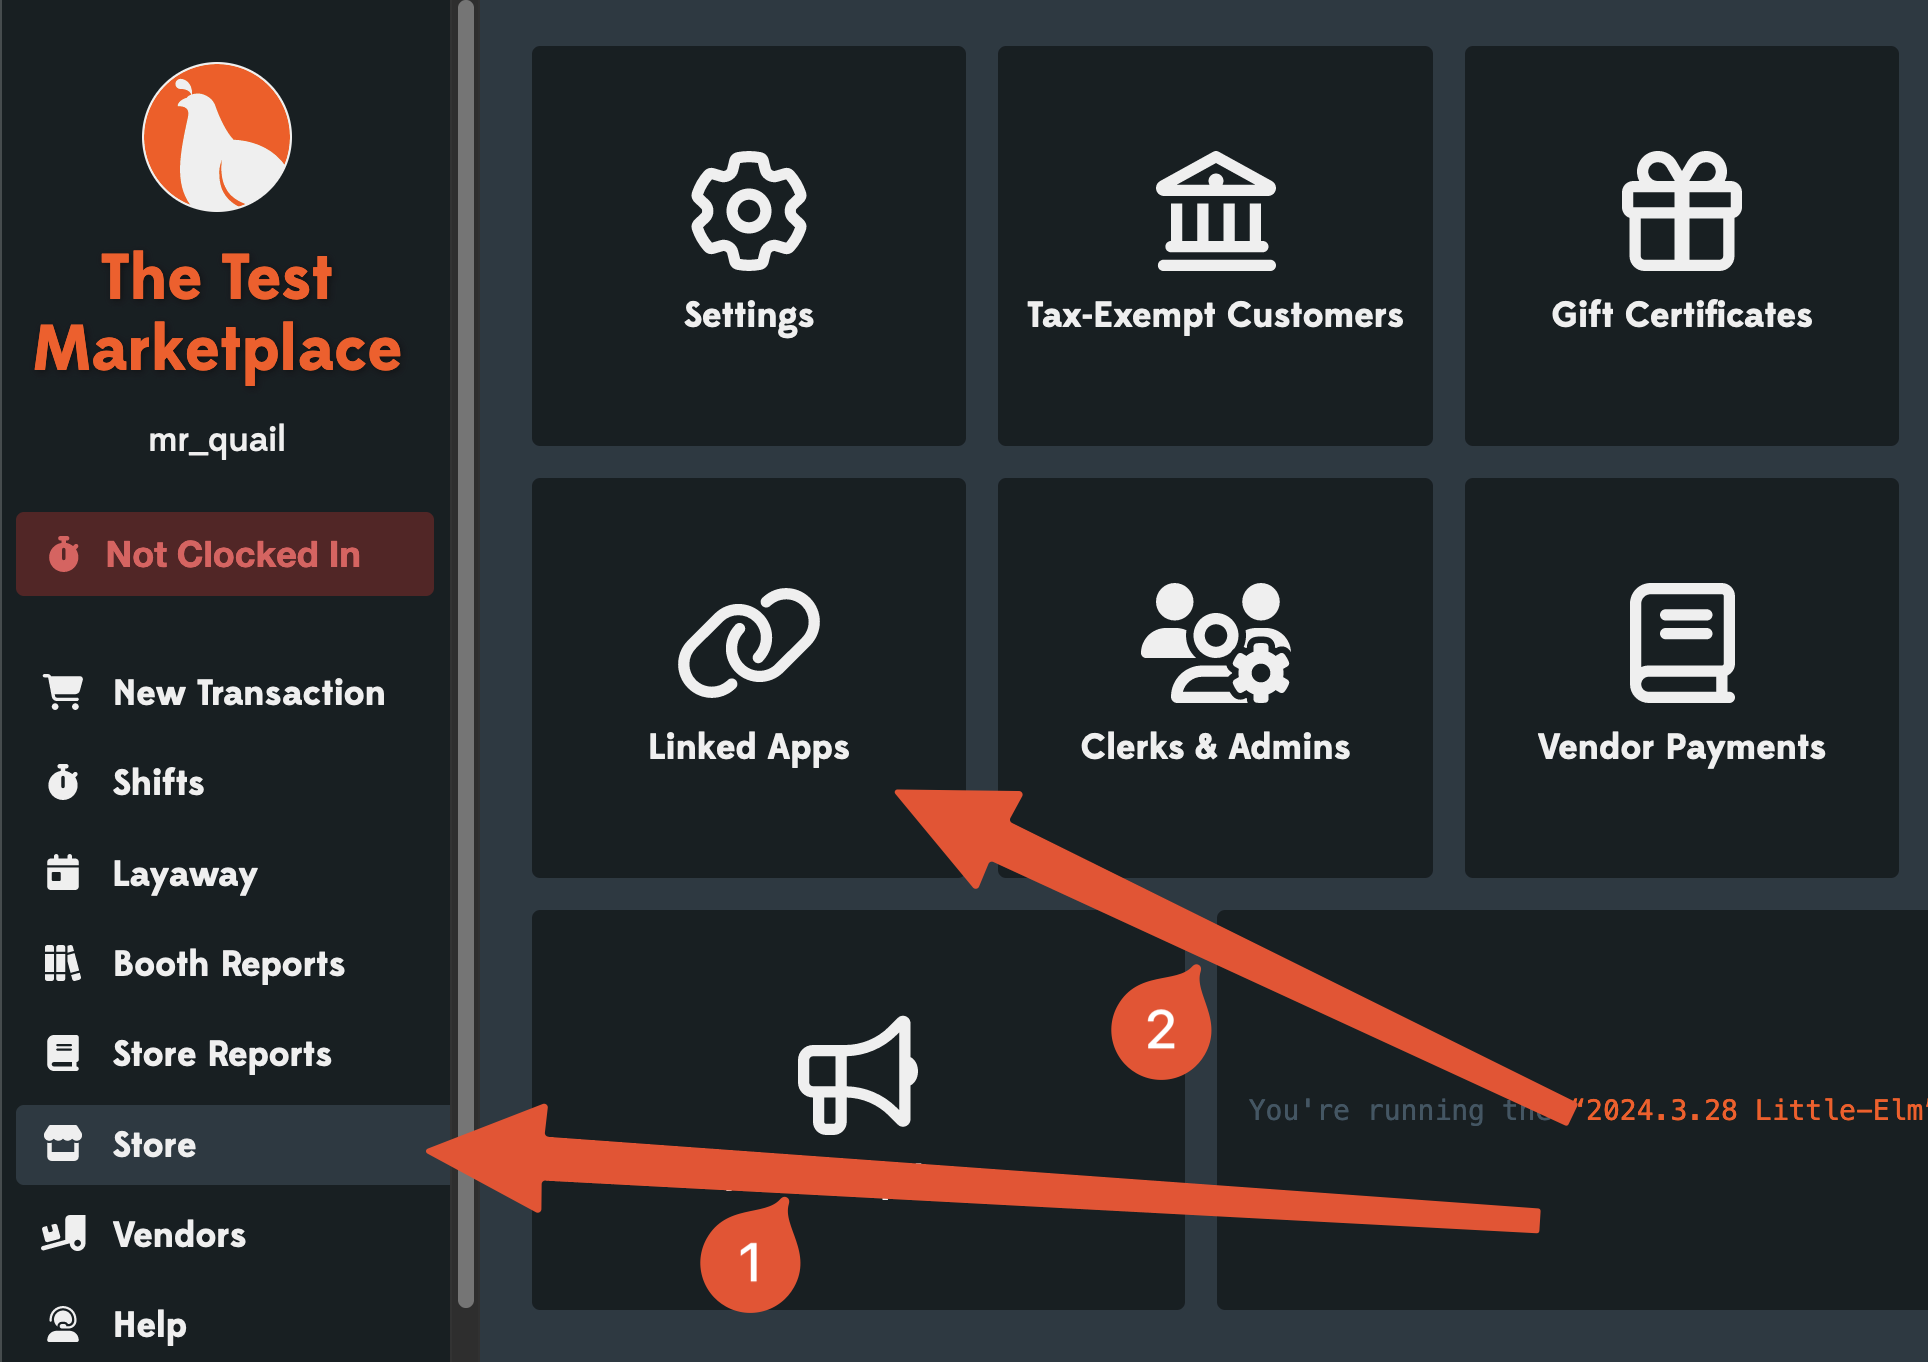
Once it comes back, it will ask for your wifi settings – go ahead and put those in, but don’t sign in to Square on the Terminal. Instead, go to Store > Linked Apps in Quail as shown below.
Next you’ll need to click the Link Existing Account button to do just that! Note:You may have to Create New Account first if you aren't already setup with Square. Once you click to link, Quail will kick you over to Square to authorize (and then kick you back).

Once you’re back, click Configure locations & card readers on that screen:

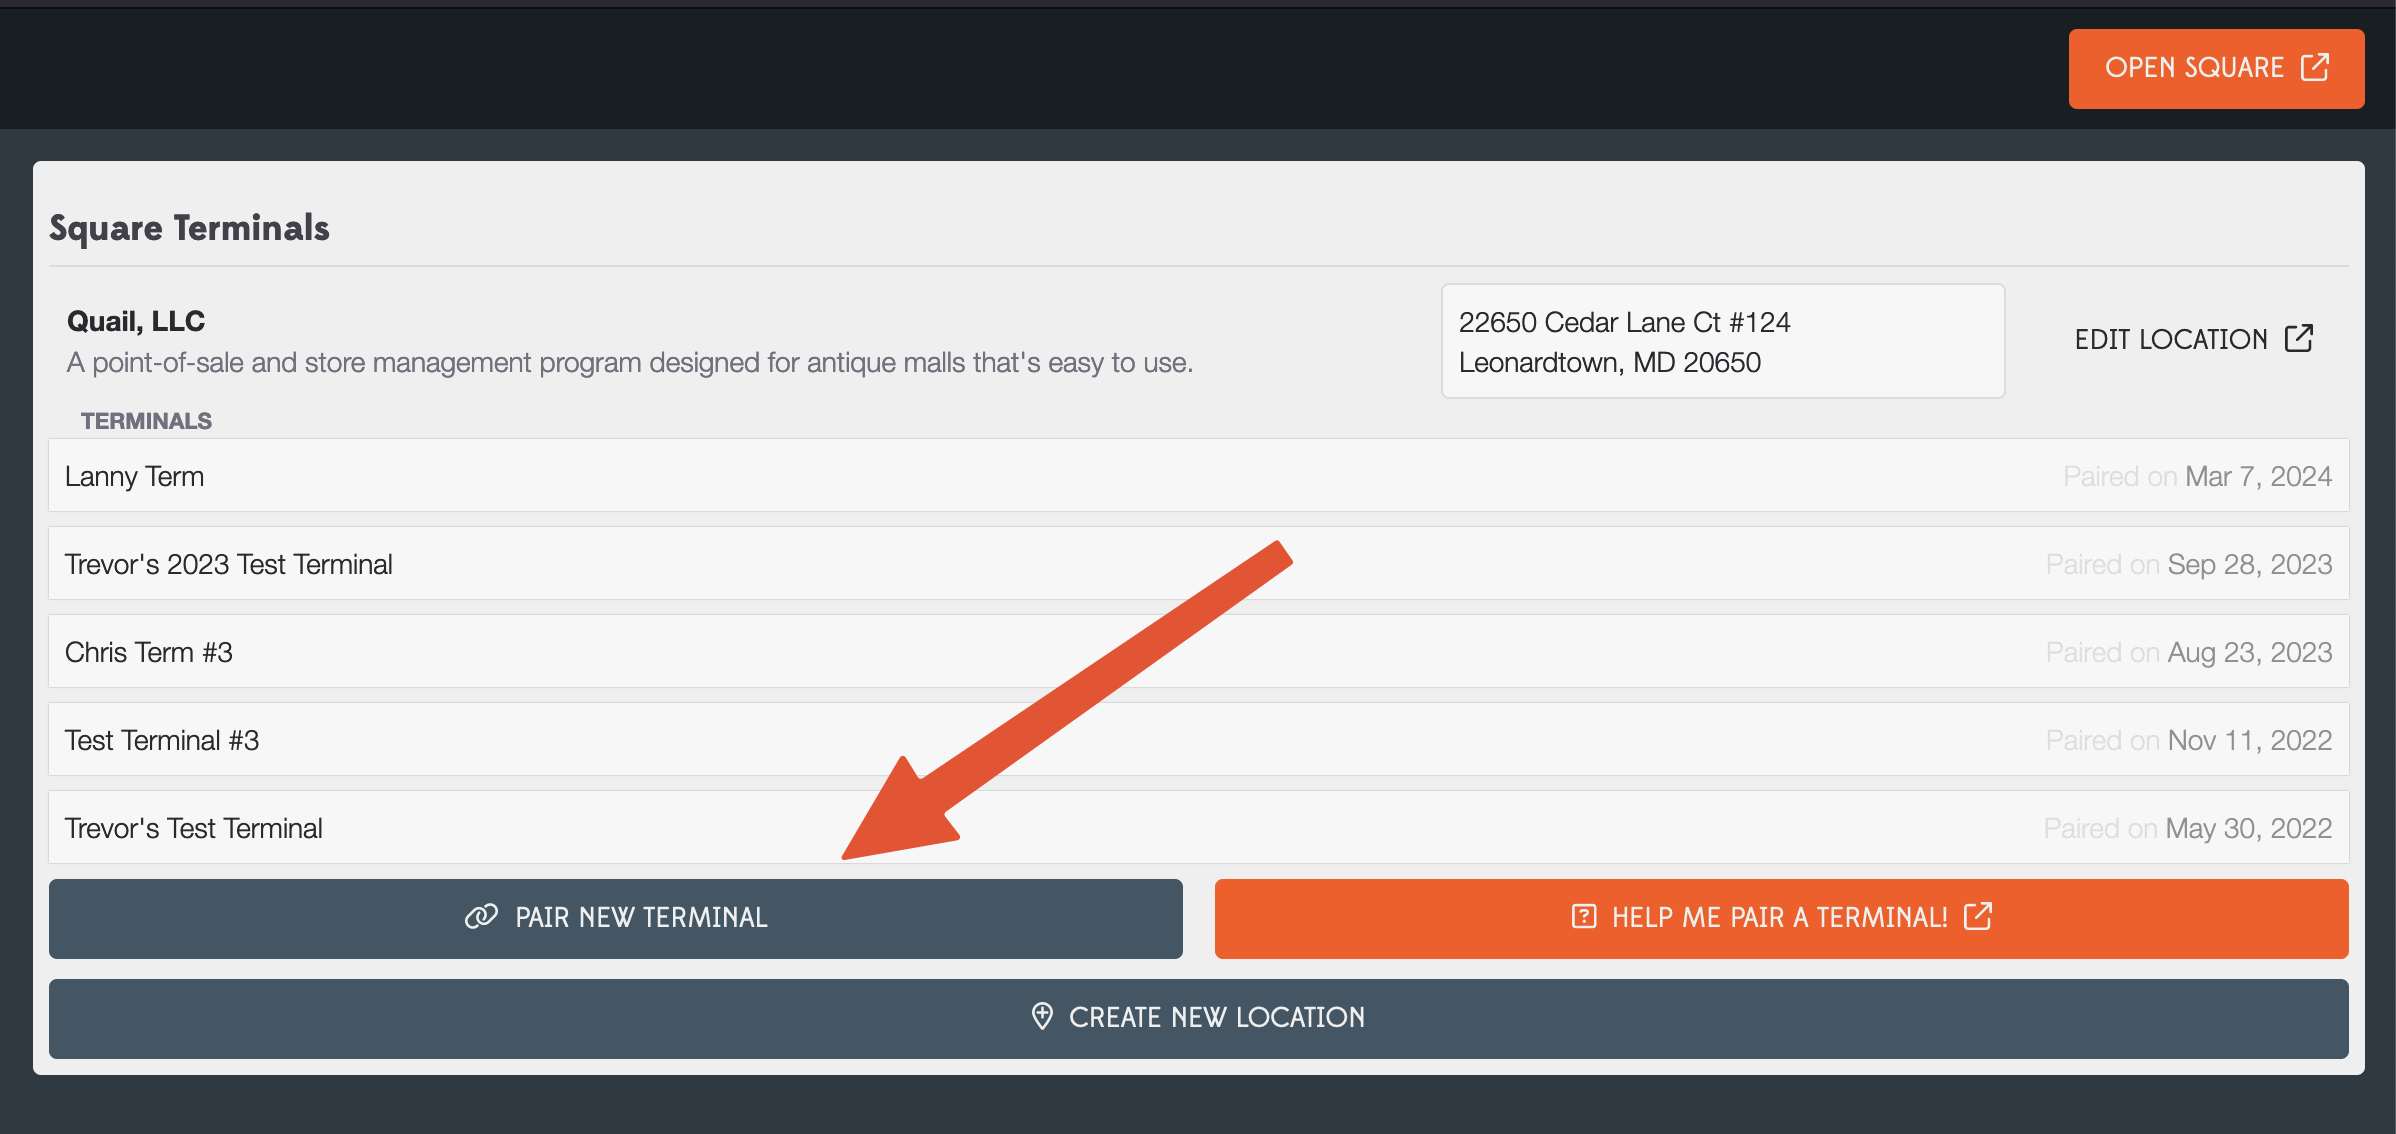
Create a new location if you don’t have one (just use your store name & address), then click Pair New Terminal:
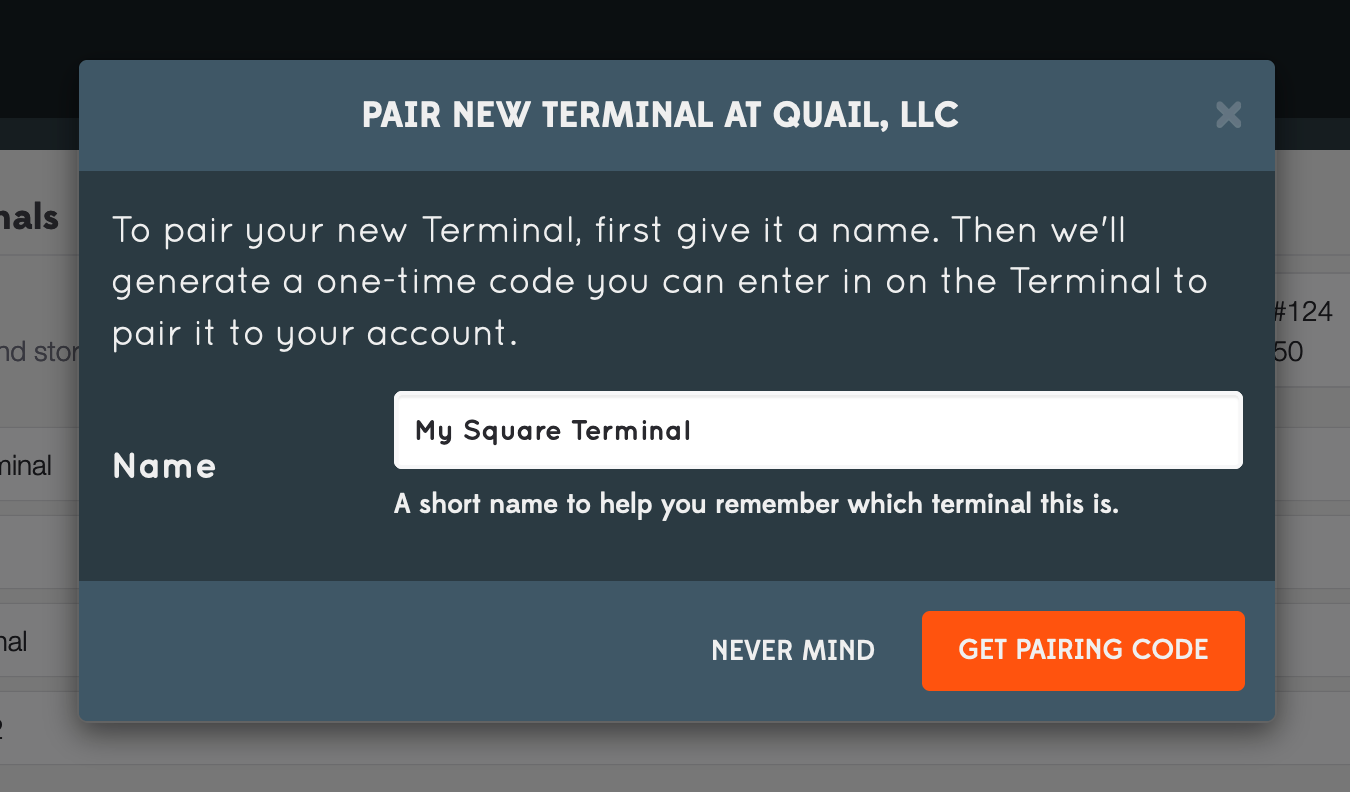
Give your Terminal a name (useful if you have more than one, not so much otherwise), then click Get Pairing Code:
That will think for a bit, then give you a short “device code” you can use to sign in on the Square Terminal. Select device code login on the Terminal instead of username & password, use the device code Quail gave you, and you’re almost done!
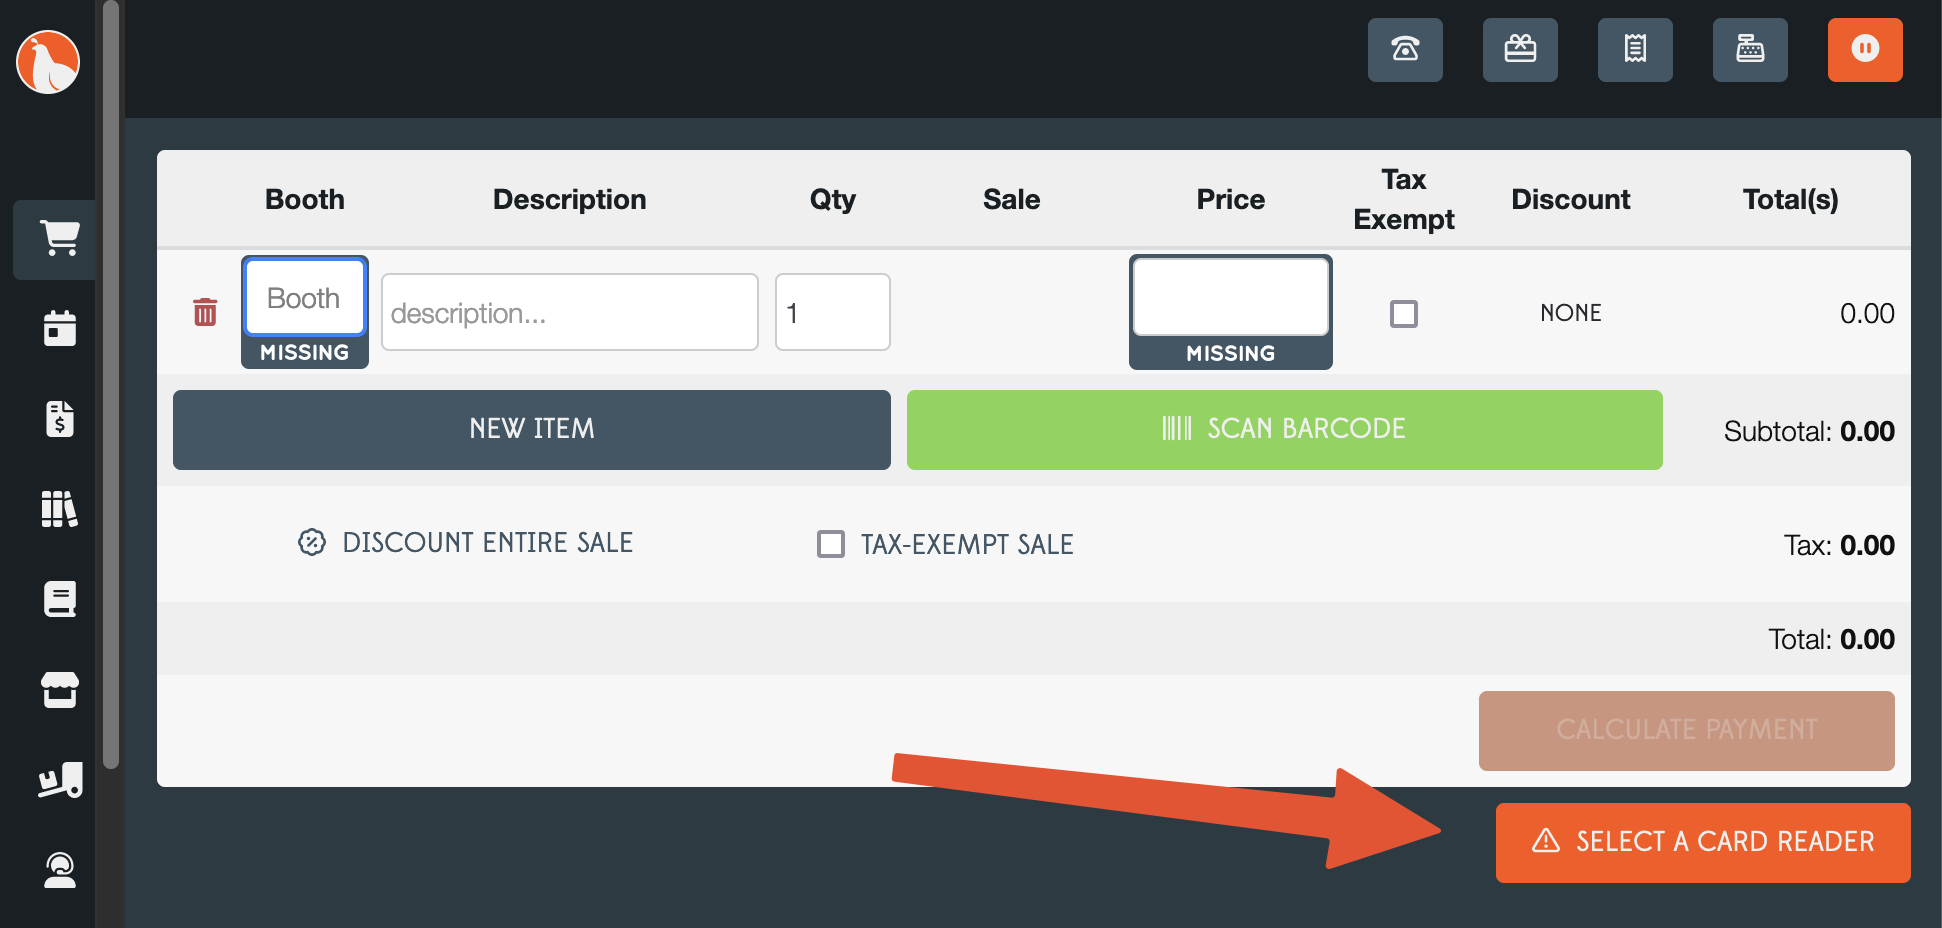
The last thing you’ll need to do is select your newly-paired Terminal in Quail. Go to the New Transaction screen and click Select a card reader:
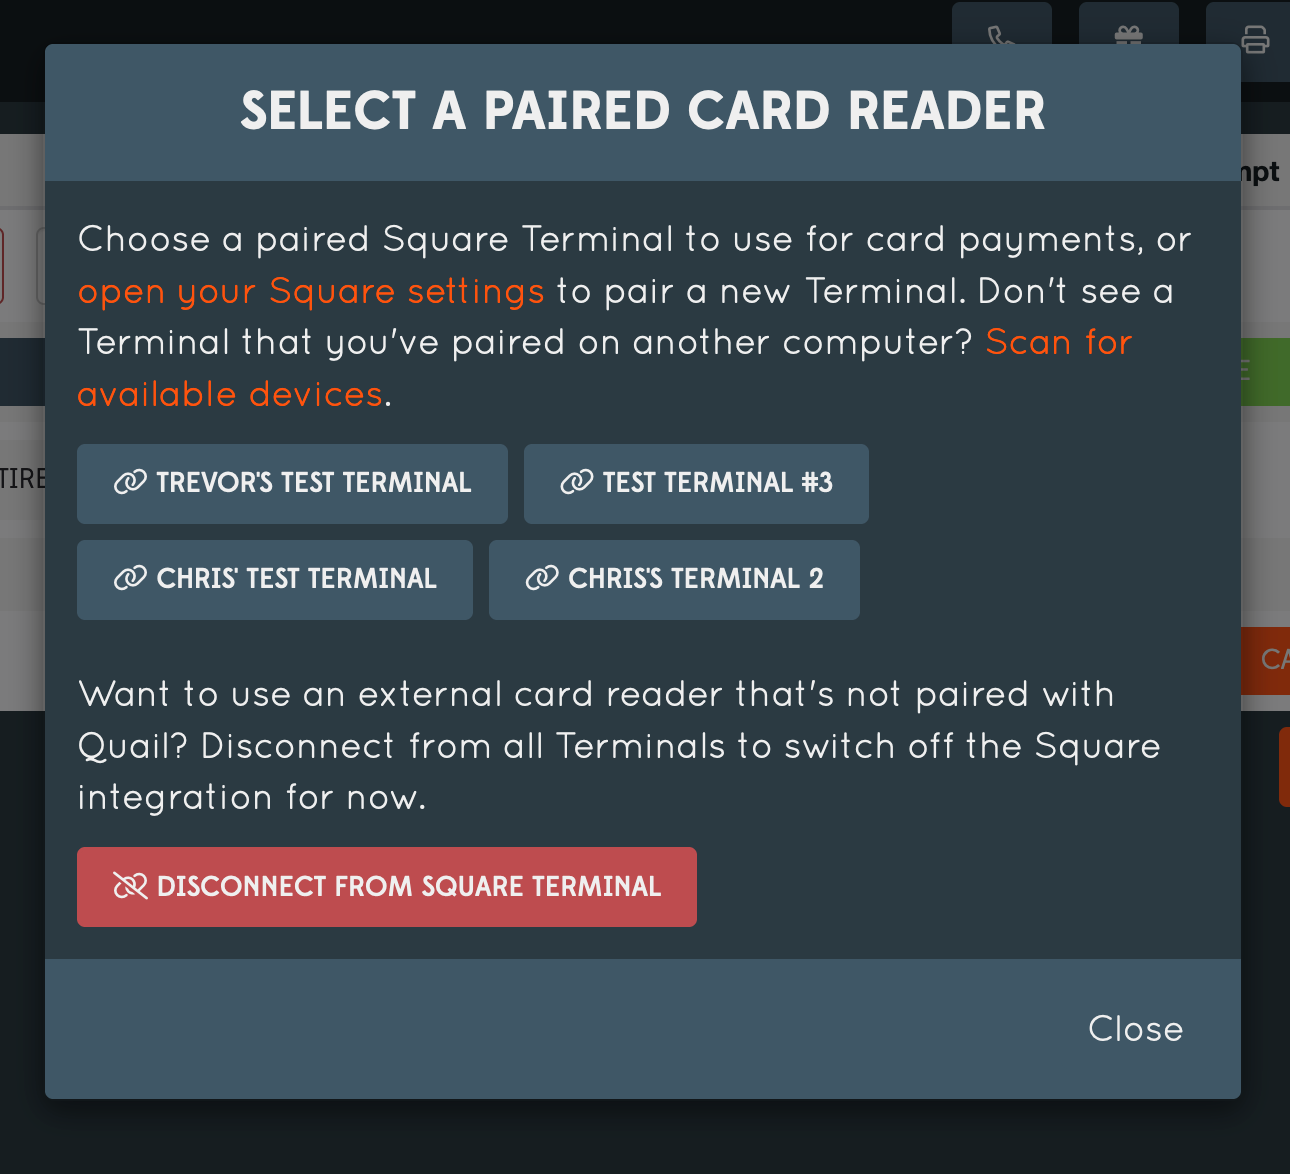
Select your terminal from the list, then click Close:
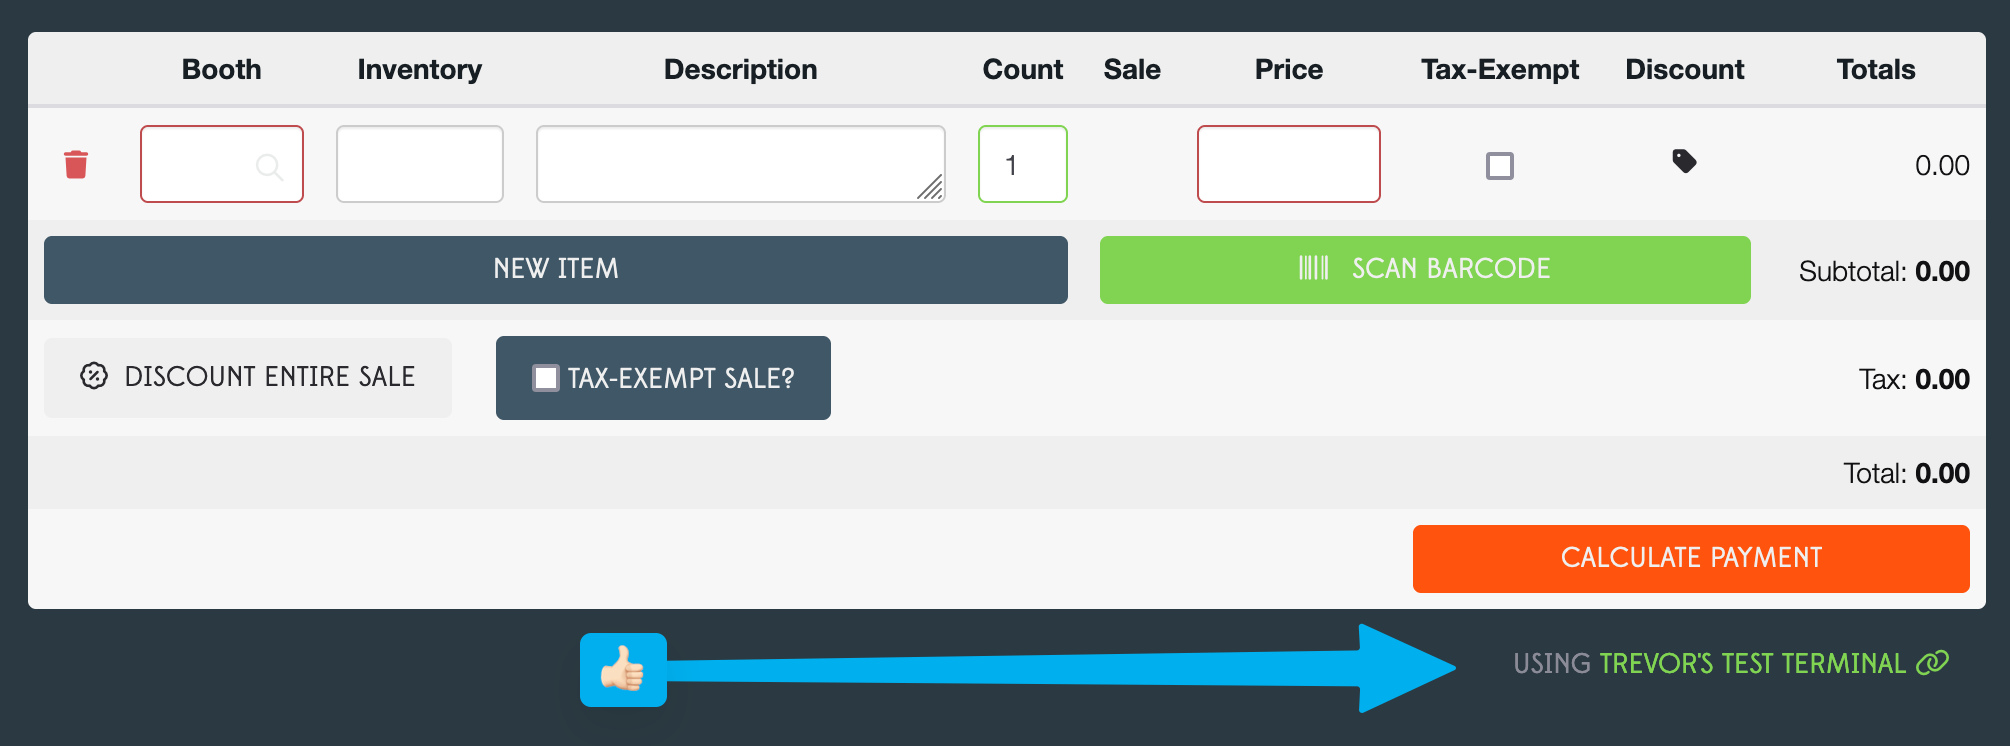
That’s it! Quail will display a little indicator whenever it’s set up to send charges to the Terminal instead of expecting you to ring them up separately: